Japanese Chicken Yakitori Recipe
Introduction
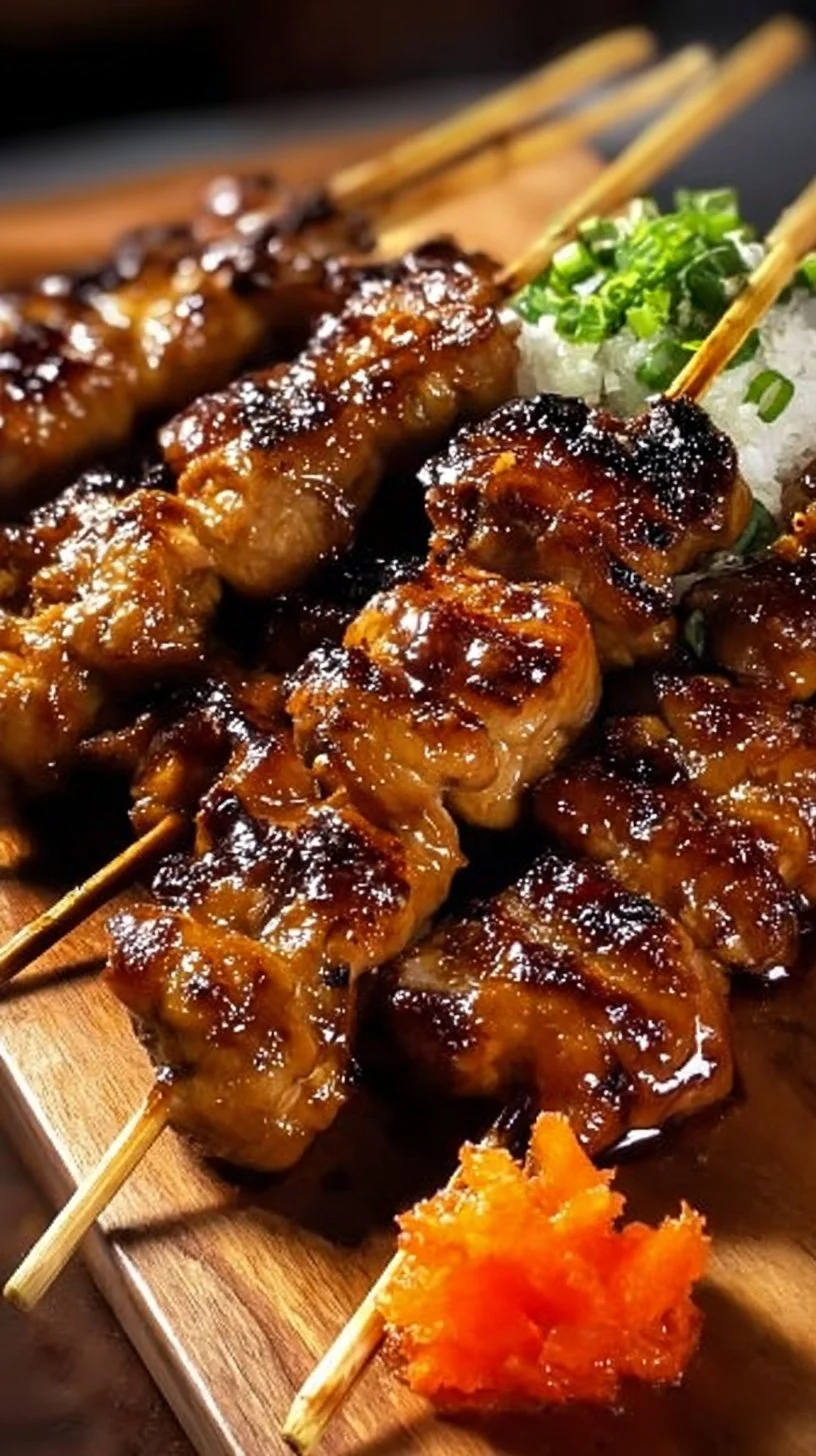
Japanese chicken yakitori is a study in reduction, texture, and focused seasoning: small pieces of chicken transformed by direct heat and a concentrated soy-sugar glaze into a dish defined by caramelized edges and a clean salty-sweet backbone. The technique is intentionally compact — short contact with high heat, rapid caramelization, and a finishing glaze that both seasons and creates a glossy surface — and it forms an excellent bridge between simple weeknight routines and precise professional execution. For those who compile reliable weeknight menus, this method pairs well with a broader set of lean-protein preparations in a busy rotation; see this easy dinner recipes collection for complementary mains and timing ideas that integrate with yakitori service.
The culinary logic behind this dish
Every ingredient and step in this preparation serves a clear functional purpose. The soy sauce provides savory umami and salt necessary for surface seasoning and Maillard reaction acceleration; water dilutes the soy enough to let the sugars act without burning immediately; mirin or red wine contributes glucose and acidity, enhancing caramelization and adding reflective gloss to the finished glaze. Brown sugar drives caramelization and yields a deep molasses note; vinegar balances sweetness, preventing the palate from becoming cloying and aiding in protein denaturation for a tender bite. Garlic and ginger deliver sharp aromatic compounds that stand up to heat, releasing volatile oils that perfume the glaze during reduction. Cornstarch is reserved for finishing to convert the thin marinade into a clingy, syrupy tare — the difference between a sauce that slides off the surface and one that adheres and builds layers of flavor.
The technique sequence — brief marination, separate sauce reduction and thickening, then high-heat grilling with intermittent basting — optimizes safety (raw juices remain separate from the finishing glaze until reduced), flavor concentration (the sauce is deliberately cooked down), and texture (rapid grilling seals juices while creating char). Understanding this logic allows deliberate adjustments: if you want more smoke, increase direct charcoal exposure; if you want a silkier gloss, adjust the cornstarch ratio marginally and finish at lower residual heat.
How to make Japanese Chicken Yakitori Recipe
This section explains the workflow as executed in a professional kitchen while preserving the recipe’s specified ingredients and steps. The core idea is to combine efficient mise en place with heat-intentional cooking.
- Prepare skewers and equipment first: soak the wooden skewers 10–20 minutes to prevent burning; set a medium-high heat zone on the grill or position the broiler rack so the chicken will receive intense radiant heat without immediate flame contact.
- Balance the sauce: dissolve brown sugar fully into the liquids to ensure even caramelization and to avoid a gritty surface when glazing.
- Trim and size the chicken into uniform 1–2 inch chunks; uniformity is essential for consistent cooking times and predictable caramelization across each skewer.
- Marinate briefly — just enough for the aromatics to adhere and for the surface to absorb salt — then remove and allow excess marinade to drain before skewering. A wet surface will steam rather than char.
- Reduce and thicken the remaining sauce into a syrupy consistency using a cornstarch slurry. Thickening separately protects clarity and lets you manage viscosity for repeated basting. Keep this glaze warm and near the grill for quick access.
For context-sensitive technique points—if using gas, increase preheat time and use a two-zone setup so you can sear over direct heat, then finish near indirect heat; if using charcoal, place coals to create a hotter center with cooler edges for more nuanced charring.
Ingredients :
5–6 pieces boneless chicken breast or 6–8 pieces boneless chicken thighs, 2 garlic cloves, minced, 1 tbsp fresh ginger, minced or 1 tsp ginger powder, 1 tsp ground black pepper, 1/3 cup soy sauce, 1/3 cup water, 3 tbsp red wine or mirin (Japanese rice wine), 1/4 cup + 2 tbsp brown sugar, 1 tbsp distilled vinegar or rice vinegar, 1 tbsp cornstarch (for thickening), 6–7 wooden skewers (soaked in water for 10–20 minutes)
Directions :
Soak the wooden skewers in water for 10-20 minutes to prevent burning during grilling., In a bowl, mix soy sauce, water, red wine/mirin, brown sugar, and vinegar until the sugar dissolves completely., Trim any excess fat or cartilage from the chicken, then cut it into 1–2 inch chunks and lightly pound to tenderize., In a large bowl, combine minced garlic, ginger, ground black pepper, and 1/4 cup of the prepared sauce. Add the chicken and toss to coat evenly. Marinate for at least 10 minutes., Pour the remaining sauce into a saucepan and bring it to a boil over medium heat. Mix 1 tbsp of cornstarch with 2 tbsp of sauce to create a slurry, then stir it into the boiling sauce to thicken it. Let it simmer until the sauce reaches a syrupy consistency, then remove from heat., Thread the marinated chicken onto the soaked skewers and grill or broil over medium-high heat for 8-12 minutes, turning occasionally. Baste with the thickened sauce until the chicken is cooked through and caramelized (internal temperature should reach 165°F / 74°C).
Ingredient analysis through a chef’s lens
- Soy sauce and water: the ratio yields a seasoned but not overly saturated surface; the water prevents premature burning of sugars and moderates initial surface salt uptake so internal proteins cook without becoming dry or rubbery.
- Mirin/red wine: mirin adds sweetness and a characteristic rice-wine fragrance while carrying sugars that caramelize evenly; if using red wine, the acidity profile shifts the mouthfeel slightly but still contributes reducing sugars for glaze formation.
- Brown sugar: its molasses content deepens color and encourages complex Maillard development; use full dissolution to avoid crystallization on the finished glaze.
- Vinegar: a small quantity functions as a flavor corrector. It increases perceived brightness and assists in breaking down muscle proteins when combined with heat.
- Garlic and ginger: both are heat-stable aromatics that lend top notes during grilling; finely mincing maximizes surface contact and flavor transfer in a short marination timeframe.
- Cornstarch slurry: thickening with a slurry after boiling ensures a stable, glossy finish and prevents starch cloudiness. It also reduces the water activity of the sauce, concentrating flavors.
Kitchen workflow & technique breakdown
Sequence and stationing matter. Start by creating two stations: one for sauce production, one for grill/broiler. While the sauce is reducing, trim and portion the chicken; then toss with the aromatic-sauce mixture so the surface receives seasoning without deeply penetrating the meat (this is intended timing, not an oversight). Keep the reserved sauce for reduction in a small saucepan and prepare your slurry in a ramekin — this reduces turnaround time at the point of glaze finishing.
Skewer assembly should be done just before grilling to minimize the surface moisture re-accumulation. During grilling, operate in cycles: sear for color development, rotate to develop even char, then use short, repeated basting with the reduced tare in the final third of cook time. This cyclical approach ensures that sugars are not repeatedly exposed to raw juices and that the glaze is layered on a mostly cooked surface, minimizing burned sugars and allowing the glaze to set and shine.
For timing on a service line: allocate roughly 12–15 minutes per batch (including initial sear and basting), and hold finished skewers at a low oven temperature (around 140°F/60°C) briefly if required for plating.
Texture control, heat management & timing
Texture is achieved by controlling contact time and heat intensity. Chicken cut into 1–2 inch chunks benefits from high direct heat to create a sealed exterior quickly; too low heat leads to extended cooking and drying. The 8–12 minute guideline balances interior doneness with exterior color — err on the shorter side for thighs, which tolerate higher internal temperatures with retained juiciness, and closely monitor breasts to avoid dryness.
The glaze stage requires particular attention: sugars caramelize rapidly above 320°F (160°C), so apply the thickened sauce during the final passes. Use a brush or spoon for quick, even layering; allow 30–45 seconds between basting passes to let the glaze set and partially cool, preventing sagging. If flare-ups occur, pull skewers to a cooler zone and finish with indirect heat; do not chase char with higher heat, which compounds bitterness.
Use a calibrated thermometer to confirm 165°F (74°C) internal temperature. Rely on it rather than visual cues alone for consistent results across breast and thigh cuts.
Professional variations
The same core technique adapts to a range of service demands without altering ingredient lists or measurements. Examples of method adjustments include:
- Charcoal versus gas: charcoal imparts additional smoky phenolics; position skewers higher from the coals for slower glaze setting or closer for immediate sear.
- Two-stage grilling: sear over high heat, then finish near indirect heat to allow the glaze to set without burning; this is efficient for thicker chunks.
- Multi-baste layering: apply several thin glazes rather than a single heavy coat to build a resilient, shiny tare.
These variations are tactical rather than compositional and keep the integrity of the recipe intact.
Finishing touches & plating philosophy
Plating a yakitori skewer is about contrast and restraint. Present the skewers so the glossy, caramelized surfaces face upward; avoid saturating a plate with excess sauce, which will break the crispness of the edges and make textures indistinct. Use a small brush stroke of the warm glaze on the plate to echo the sauce profile without smothering the meat. When composing with starches or vegetables, maintain separation so steam does not degrade the glaze’s texture. For inspiration on simple, restrained finishes that support a protein, consult a complementary recipe technique such as the garlic-butter chicken and bowtie pasta approach to complementary saucing.
Maintaining quality after cooking
After cooking, rapid resting of skewers for a minute or two stabilizes juices but do not rest so long that the glaze softens. Hold at service temperature (around 140°F/60°C) under slight humidity control — a perforated hotel pan with low oven heat is preferable to a steam table, which will make the exterior soggy. Reheat gently if necessary: a quick pass under a hot broiler or on a hot grill grates for 30–60 seconds will refresh char and re-melt glaze without overcooking. Avoid microwaves which destroy texture and gloss.
Questions from home cooks (chef answers)
Q: Why is the marination so short?
A: The recipe targets surface seasoning and aromatic adhesion rather than deep penetration; prolonged marination with soy can overly salt and tighten lean breast meat. The brief marination ensures the aromatics are present and the surface takes up enough seasoning to promote Maillard reaction.
Q: Can I skip thickening the sauce?
A: Technically yes, but the reduced, thickened tare is what clings and builds the lacquered finish. Without thickening, the sauce will slide off and will not provide the same glossy, layered flavor.
Q: Why separate the sauce reduction from the marinated chicken?
A: Separating prevents raw chicken juices from contaminating the finished glaze and allows you to concentrate and control the sauce viscosity without risk of food safety issues.
Q: How do I prevent burning during basting?
A: Apply thin coats near the end of the cooking cycle, allow brief set times between passes, and use a cooler zone to finish if the sugars begin to darken too rapidly.
Final chef notes
Precision in this preparation yields consistent results: uniform chunk size, brief aromatic marination, separate reduction and thickening of the glaze, and a focused grilling window. Each piece of technique serves to protect moisture while developing a concentrated, layered surface flavor. Maintain station discipline—mise en place, two-zone heat, and pre-made glaze — and the dish will deliver the deep, caramelized notes and clean texture characteristic of professional yakitori.
Conclusion
For additional recipe context and variations on Japanese skewered chicken techniques, you can review this thoughtful Yakitori primer on RecipeTin Japan’s yakitori guide, which explains regional variations and grilling specifics. If you want a classic, home-friendly yakitori approach with clear step-by-step photos, consult the Just One Cookbook yakitori recipe for visual reference and technique notes. For a detailed discussion of negima and scallion-interleaved yakitori, Serious Eats provides a methodical walkthrough at their negima yakitori recipe.
Japanese Chicken Yakitori
Ingredients
Method
- Soak the wooden skewers in water for 10-20 minutes to prevent burning during grilling.
- In a bowl, mix soy sauce, water, red wine/mirin, brown sugar, and vinegar until the sugar dissolves completely.
- Trim any excess fat or cartilage from the chicken, then cut it into 1–2 inch chunks and lightly pound to tenderize.
- In a large bowl, combine minced garlic, ginger, ground black pepper, and 1/4 cup of the prepared sauce. Add the chicken and toss to coat evenly. Marinate for at least 10 minutes.
- Pour the remaining sauce into a saucepan and bring it to a boil over medium heat.
- Mix 1 tbsp of cornstarch with 2 tbsp of sauce to create a slurry, then stir it into the boiling sauce to thicken it.
- Let it simmer until the sauce reaches a syrupy consistency, then remove from heat.
- Thread the marinated chicken onto the soaked skewers.
- Grill or broil over medium-high heat for 8-12 minutes, turning occasionally. Baste with the thickened sauce until the chicken is cooked through and caramelized (internal temperature should reach 165°F / 74°C).